I wish I had pictures (of my own).
But since I am not actually cooking, I can’t actually have pictures of my own.
(This photo is borrowed from Tasty Kitchen. It is Herbed Brown Rice with Red Onion.)

Broccoli and Cheddar Potatoes picture borrowed from Safeway
Beef Brisket (photo borrowed from Garden of Eden Marketplace)
Well now that I’ve borrowed images for my title. I thought I would explain this post. Since, I call Crackling Pork Rinds my retired blog for reblogged recipes, I thought I would use it creatively sometimes. I am very timid about the thought of suggesting recipes and recipes ideas when my cooking track record is about microwaving TV Dinners — I do want everyone to know this. (And reheating restaurant food and microwaving other prepared bag, frozen and boxed food.)
My timidity stems not only from embarrassment I guess, on an initial ground, but also from the real fear that I am influencing someone or anyone to spend money on a recipe which isn’t tried and isn’t true and is just a vague suggestion of a put together plate of some food substance that sounds like a darn good idea.
But I’m thinking of bridging this fear and disclaiming on each trial post of this kind to NOT try the recipes that AREN’T reblogged, because they are my own and I do not have any track record of cooking that is true. Or accomplished. I’m very good however, with putting together menu ideas.
Well, I have been studying recipe, cooking and food blogs for a while now and enjoying it and some of the best blogs I also enjoy are those that are not really exceptionally descriptive about how the dish or plate is made and that don’t elaborate much about ingredients, measurements, completions or methods. These are some really fun suggestion sites and rationally, if you followed out their vague advice, you could also be wasting a lot of good food and money.
So here is disclaimer: DON’T try this group of recipes. I have no idea how they might turn out and you might just be wasting your money with the good food you used to try to put together what has no meaning but as some kind of gesture of an idea.
That being said. I thought this was a nice simple throw together. I didn’t want to get too advanced, like suggesting an actual start to finish oven roast on my own. I’m almost sure some turn of it would end up a sorry mess. So — let’s just start.
And furthermore, I have learned that, it’s unnecessary to actually be a shining star all the time but sometimes, just the most ordinary suggestions will win the day. I guess I might have known that, but sharing that kind of idea on a blog, with all the professionalism out there, is kind of intimidating.
Now, I just don’t know how I will repeat all this disclaimer all the time. So I might fix portions of this post here up to the top of this blog. We’ll see how it turns out.
Since I don’t enjoy cooking — at all. And love eating — too much. And really enjoy a good meal — enormously. And can usually tell myself what I’d like to eat, I am thinking doing something enjoyable for the table, that is easy to get through. Title being up top.
(You will soon learn that my planning and timing skills in the kitchen — do not exist. So it’s best to read through the entire plan first and then decide what can be salvaged.)
Butter Brisket
Using a general bird roasting metal pan, rinse off the brisket (about 3 pounds) and let it dry on paper over a cutting board. Place the whole meat on top of the roaster rack in the pan after seasoning. Place in oven at about 375 F to 425 F depending on the strength of your own oven for so long as you can see it will take to brown the meat without darkening to a burnt roast quality.
Seasoning and prep of the brisket. On a large ceramic plate — my preference to a cutting board — those are just for placing things on to keep separate and clean from other things — trim off most of the brisket roast fat so that there is some left to cook through for rendering. Remember, that this meat will receive a thin margarine or butter cover up to add to it’s salty oil.
At the top part, what part you will face up first for cooking, score the meat in only slightly so that you may send in the oleo with a butter knife. Then do this: put in small amounts of butter or margarine oleo into the grooves of the top of the scored brisket, as though you were buttering a piece of toast in those grooves.
Have your preferred seasonings ready. I tend to not enjoy discussing seasonings, because I prefer the same flavors all the time and I feel those same flavors get too overwhelming to taste generally and I seriously prefer other people’s advice for seasonings. (I don’t know how many more times you might have to hear this if I post food again on my own.)
So of course, here are a few of my favorites: rosemary; paprika; powdered garlic, or in this case, chopped fresh garlic clove; powdered onion, or in this case, chopped, minced white onion; a little bit of coarse salt. And for pepper seasonings, I always prefer red pepper flakes or else chili powder or both. You can see, the taste gets monotonous. Because it’s just a fiery, garlic taste. I’ve discussed my use of garlic, onion and paprika several times elsewhere and I think it’s just a monotonous fiery taste that can be adapted to more or less volatility. But I don’t feel like I know other seasonings well, besides parsley and oregano, salt and pepper otherwise. And I don’t know how to break out of this vicious cycle.
So any section of these mentioned articles of seasons are fine with me. Of course, sage and thyme are good (in powders), but I’m not sure what else to pair them with. So work with these suggestions if you like. Then rub in the seasonings in an even amount (I’m also not sure how to measure seasonings), to taste, over the entire brisket.
Here I’ll introduce a trick I don’t know how to really explain. I’m also afraid, it might cause a fire in some ovens. So really, really in this case, don’t try it, but maybe it will mean something.
Prepare a thin layer of oil underneath the brisket rack and drop in a few vegetables of choice; turnips, white onions, parsnips, yams — whatever you don’t care becomes a taste to that brisket overhead. And then also drop over the rest of your seasonings to the oil layer of unsuspecting and otherwise unprepared veggies. (Actually you should rinse and peel those and just chunk into large, comfortable pieces, them up to put them in underneath.)
Put the entire thing in the oven then. You have to watch it. I don’t know how to suggest times like I don’t know measurements well. And then you know, not so much — watch it, like don’t get fresh with the brisket, but watch it cook so it doesn’t burn.
When you see the brisket it getting cooked over the top, take out the roaster from the oven for a moment. Put the brisket on a clean ceramic plate for a moment, face up. Remove the rack (using thick mitts of course), and put the brisket face down, that is, score side down, over the vegetables which should have also cooked some. If they are all cooked through, then also remove the vegetables from the roaster at that time and just leave the brisket face down alone — you might have to drain some of the oil, not all because it might otherwise burn the brisket. Then finish cooking the brisket to the other side, ladling out some of the oil onto the top. (Don’t be afraid to treat the oil with small amounts of water.)
Watch that the other side is cooked and the now bottom isn’t burned. Remove from the oven. Place on a ceramic plate for serving.
Balsamic Cooked Rice Pilaf
Note: you’ll need rice vinegar for this.
Using your favorite rice pilaf from a bag or jar, measure out however much amount you feel you can handle for your servings. (And that will also cook safely.) Put this amount in a rice steamer and get it steaming to done. Then leave it on idle if it cooks too quickly for the rest of the items to finish.
Then get together, red onions, kale, and portobello mushrooms and some minced garlic or pressed fresh garlic cloves. You are going to have to steam up the kale for me a little bit, since I’m not sure if you can cook kale raw. I should know this by now with all the kale recipes I refer to in reblogging, but honestly, I think I might fail the cooking class if I have to tell that I am sure about the cooking kale from raw. I am not. It has all different kinds of situations. (Coincidentally to anyone’s question that I might learn from watching others; I never watch other people cook. That is my LEAST favorite past-time. Funny to me I ever had to tell that anecdote again as I just have. I prefer to read a book or watch a good show while other people cook. Sorry. I’m dispiteous. Is that the word?)
So steam the kale a bit to done, not completely. Slice the red onions into larger slices, then chop the slightly steamed kale so that it can be sauteed, then slice the portobello mushrooms long wise to be larger slices like the red onion. (I’m going for big texture over the rice pilaf — simply childish ideals, but they’re my own.)
Now, using a nice jumbo cooker for your stove top, and this should be when your rice pilaf has finished steaming as done as necessary to cook through the stove top portion then — I’m looking for a really fluffy to start but almost fry to finish ending for the pilaf — put some oil in the jumbo cooker and dump in all your vegetables. Saute your vegetables. Should we add seasonings? This is always the question. We should, but I’m not sure what to suggest as always. So I’m not going to add more seasonings (besides the garlic). (You may if you have a sure thing to use.) I am going to try a few shots of rice vinegar right on top of the vegetables. (This is supposed to be the balsamic. That is just to bring the vegetables to taste with the pilaf.)
When the vegetables are a little soft and look like they might start cooking through, pile on as much of your steamed rice pilaf over the vegetables and begin to cook through top to bottom, drenching up the oils throughout all the pilaf and bringing around the vegetables so that it all makes a pie almost.
(Honestly, if we had used basmati white rice, we could have at this point, made a rice omelet. Other thought along the way. But we’re not going to do that, because this is easier to dream about. If you wanted to though, just replace basmati white rice from the rice pilaf and when the basmati is cooking through those vegetables into an unformed pie with the oils infused, add maybe at least 3-4-5-6 (even) whole beaten jumbo eggs and let them set into the jumbo cooker with the rest of the ingredients, while you turn the rice and vegetables around in the eggs. You should get a rice omelet. Or at least an egg and vegetable stir fry. Again, the measurements are nothing I can help with and I suppose they are key to success.)
In the meanwhile, back to the pilaf. When the vegetables are cooked through, turn off the heat and dish out the jumbo cooker into a large ceramic bowl. It should be ready.
You could add coarse black pepper to the dish, but I’m not sure at what point to introduce it — if during the rice to pan cook through or just when the vegetables are new to the jumbo cooker.
This is now completed.
Cheddar Broccoli Potatoes
Get your ingredients together. Larger yellow potatoes. Cheddar bricks or cheddar cheese in large enough quantity to drench your potatoes during baking. A few good pounds maybe of broccoli, or at least a pound of broccoli. (I don’t know if it’s important to have to use fresh broccoli. I think you could use frozen bag broccoli.)
We’re going to rinse the potatoes and broccoli of course. And trim off just the necessary lower edges of the stems of the whole broccoli. And separate stems from stems the best we can and then either peel or not peel the potatoes if they are yellow and thin-skinned, but otherwise, if they have a tough skin, do a quick peel job.
Then we will slice the potatoes so that they are fat and round and not so that they are long like fries (although the long fry cut is an interesting idea and might be done). Broccoli — everything should be used once the lower stems are cut off, so cut up the broccoli however you will prefer the size of the pieces in the bechemel (I spell that incorrectly I fear), of the oven bake.
Now I just need a bechemel. I’m not sure how to do that, so I will have to cheat and get someone’s bechemel to use. I will in a moment.
The way this bake will be assembled is a layer of bechemel, potatoes, cheese, broccoli and bechemel again. If you have better suggestions for layering, please go ahead with your own plans for assembly. You can also add some light seasonings at any part of the layers preferably the potatoes, but I can’t think of what to suggest right now. Parsley? Maybe. So a thin, even shake of a parsley over the potato layer.
Once I have the bechemel in place, that will be all for this part. It should cook at the same advice I always give — 375 to 425 F depending on the strength of your oven for the duration it takes to seem edible for serving. (Not sure exactly.)
Bechemel, so far as I know, would be, half and half, flour, a little loosening water (like tablespoons not otherwise), a little salt (little), possibly a beaten egg white (also unsure; I need to look it up), and since I would like an au-gratin bechemel, some flavored or unflavored breadcrumbs (your choice), then mixed together in a pyrex bowl. I’m almost sure my bechemel will bubble up and burn, because I’m almost sure I’m missing oleo. (Let me check. That was my try without cheating.)
Turns out that principally, I forgot: bay leaf, clove, nutmeg, white pepper, salt and butter. That’s kind of sad. For me, I mean. Well, you can use that for a measure of how off-based my lacking experience really is. What did I suggest instead? Parsley. (Okay. Sorry.)
Definitely, I am adding butter to my half and half and flour/water mix and also bay leaf to my parsley and I’m still including breadcrumbs instead of the other ingredients which are the tacitly traditional seasonings I’ve just mentioned in my check above.
So again; my experimental bechemel: half and half, flour, loosening water, pinch salt, beaten egg whites, breadcrumbs, bay leaf, parsley, butter or margarine.
Because I don’t want to ruin everyone’s dish otherwise, I am including Betty Crocker’s easiest recipe for bechemel.
(The other, more traditional note of ingredients was from The Spruce Eats. But I think the sauce is too much for this broccoli dish which should feature cheddar.)
That then is all I have to say today. I don’t know when I might return with more ideas about what to put on the table.
Have a pleasant day!
 It’s Sunday and I get to play in the kitchen so it’s a great day. This chicken recipe is one I have made a few times before, but it has been about 3 or 4 years since the last time. It’s one of the few chicken recipes I actually like. We had baked potatoes and caesar salad with it. Baked potatoes everyone knows how to make, my caesar salad dressing is a post Mar. 30, 2019. You can use a bottled dressing but it’s super easy to make. The breaded chicken is a little different than you would think breading a chicken breast would be done. It just works, and the flavours all blend together well. This is away easier than a normal breading technique, and any coating will work with it. This is the one my wife and I like.
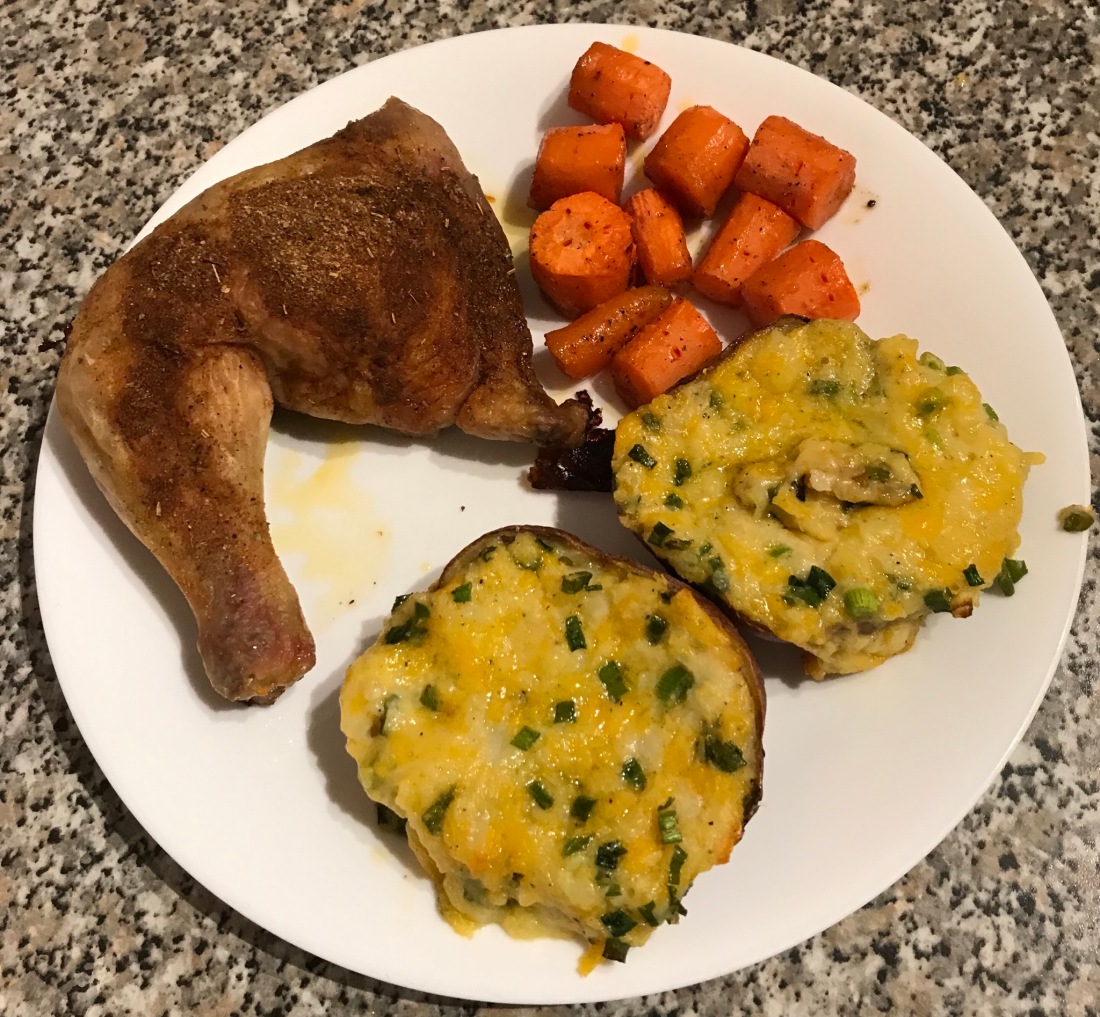 Bone in skin on chicken thighs with legs attached if you like chicken are an inexpensive meal. Since I am not a big fan of chicken, other than really good fried chicken, I have to do a little more than just roast them. So for supper tonight I made what some would call a dry rub, but it’s just a few spices mix together. I think I have tried about a 100 different things to chicken to flavor it. This is just another one of the things I do to add a little different flavor to chicken. Since I roasted them with the skin on you need to heavily season them so that the seasoning so it penetrates the chicken.

